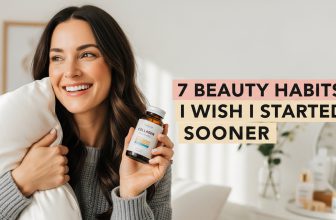
5 Makeup Tips for a Natural, Radiant Look Glow Up Effortlessly

We’ve all envied those flawless Instagram looks, but guess what? You don’t need a pro to glow.
5 Makeup Tips for a Natural, Radiant Look Glow Up Effortlessly

Let’s be honest here. At one point or another, we have all had that moment of staring into the mirror and wishing that our makeup looked as perfect as it does on Instagram. Spoiler alert: They actually have professional makeup artists working behind the scenes. But hey, they don’t need to worry because you can easily look radiant without the need of a glam squad. OH, and did I mention that makeup can be your best friend and not a frenemy with just a few easy tips? With the number of mistakes I made, from cakey foundation to over-blending bronzer, I can easily say that I spent years trying to learn everything from YouTube tutorials. Now, as an aspiring makeup artist, I have discovered some tips that can help anyone achieve a natural and stunning look with ease, regardless of their skill level, budget, or skin type.

This article walks you through five easy makeup techniques which, if done correctly, can boost your beauty without any effort. If you are extremely busy or prefer a low effort routine, these tips will work around your lifestyle. Do you want to look fresh with a sunny glow like you just returned from a vacation? Let’s get started!

1. Replace Skin Foundation with Skin Tint

I understand that you love full-coverage foundation and full-coverage foundations are a one-stop solution to all your skin imperfections. Skin foundation can make your skin look even worse, exuding the “I woke up like this” vibe that you so desire, courtesy of heavy caking. Skin tints are the perfect alternative for these skin foundations because they have a very light feel and a glowy approach to letting your real skin shine. Skin tints are also available for winter and summer. I personally prefer L’Oréal’s Naked Sundays and Estée Lauder’s products.

How to do it: Begin with a cleansed and prepped face. An exfoliant such as Beauty of Joseon’s Glow Repolishing Milk works wonderfully, as it instantly delivers that stunning glow. Skin tints should be placed on the cheeks and forehead; use a blending brush to stipple for a more polished appearance. For a more luminous finish, use a Beauty Blender to finish. This method allows the makeup to be placed on the skin without streaks or creasing, even on my oily skin.

Pro tip: For a beginner-friendly application technique, this Instagram post demonstrates the skin tint application beautifully.

2. Boost Your Glow with a Dewy Base

Have you ever wondered how certain women achieve that radiant glow? The answer lies in prep. This tip is specific to the application of foundation; applying an oil-free glow product beforehand makes the skin look dewy instead of oily. In the past, I would skip steps like these thinking they were nonessential, but after trying Glow Recipe’s Watermelon Glow Niacinamide Dew Drops, I was surprised at how fresh my skin looked without the need for too much makeup.

How to do it: After washing your face, softly pat a few drops of a glow serum or dew drops on your forehead and cheeks. Do not rub because irritation will occur with gentle, non-friction tapping. This radiant and smooth finish will be able to make the skin tint or foundation flow effortlessly. If too much shine is a concern, let it go because the skin tint will take care of it for a more natural look. 

Why it works: Splashing a glow serum or dew drops is similar to hydrating the skin because it nourishes and brightens immediately. Furthermore, the application in spring and summer is quite useful to achieve the sun-safe glow. 

3. Contour Like a Pro with Cool Tones 

Contouring can feel intimidating— how do you ensure the contour will not make you look like you dipped your face in excessive bronzer? Struggling to find a contour that does not make me resemble a pumpkin is something that I can relate to. The secret is effortlessly pulling it off using a cooler shade cream contour to create gentle face sculpting shadows.

How to complete the task: Apply your contour in the form of a cream (for value, I recommend e.l.f.’s Halo Glow). Choose a contour a hair or two darker than your skin tone. I suggest a middle of the hand application by dabbing the product on the back of your hand— this will control the amount of product used. Next, using a dense contour brush, apply the product on your cheeks, jawline, and nose tip. Blend it with a fluffy brush, lightly tapping the brush to the skin to minimize patchiness. Activate blending mode for a lifted look by focusing on blending to the cheekbones in an upward motion.

The challenge: Shade matching can get tricky, especially from a drugstore—for me, it’s always the Blu Ray challenge. If in doubt, get a cool toned one and test it by applying it on the jawline under natural light. In my case, after trying this technique, it seemed to breathe life into my face without making me look overdone. One of my friends went as far as asking if I’d travelled recently.

4. Before applying concealer, add some colour

This is clearly note of details hack, still beats me why i wasn’t introduced to it sooner: for a brightened airbrushed effect, place blush before concealer. To explain in laymen terms it’s colour correcting your face to emphasize eyes and skin. In the case it’s almost like heresy, I’m an avid shopper of Fenty Beauty’s cream blushes; dual use in my book goes to their finish which while buildable is blurred out. Most importantly, photos for people unversed in showbiz.

What you need to do: Pick a red or cool-toned blush for that ‘just blushed’ effect (my personal favorited is Fenty’s “Girls” shade). Dispense a bit on your cheeks just below your eyes and blend it with your fingers or a streaky brush such as Hourglass No. 15. Drag it across your cheeks for a slight sun-kissed effect. This vibrant base will be enhanced, not covered, by the concealer.

Why it is easy: Blush, particularly in cream formulation, is quite forgiving. In case of overdo, blending it with fingers works perfectly, any stress-free day. This step allows your face to look brighter and healthier as if you just went for a brisk walk. Have a look at this Instagram reel for a blush hack that went viral!

5. With the Use of Minimal Powder, Set It and Forget It

For makeup novices, powder can be an enemy, and it’s very easy to go overboard and end up looking cakey. A light dusting of powder can be the secret to locking in the makeup for an airbrushed, flawless skin finish that we all desire. The trick is to use it cautiously and strategically.

How to do it: Purchase a loose powder (e.l.f. makes an affordable one) or a pressed one like Charlotte Tilbury’s. Pour a bit into the cap and collect some powder with a fluffy brush. Tap off the excess – seriously, not too much is better – and press it under the eyes and other oily areas like the T-zone. Do not swipe – by pressing the powder, it avoids patchiness while keeping the glow intact.

Overcome the fear: Scared of looking over-dry? Avoid baking (it’s too intense for beginners) and focus on the highlight areas. This is hands down the best tip I can give because it smoothed my skin so much; A co-worker asked if I had a facial. It’s all about that subtle professional touch.

Wrapping It Up

There you go – five easy steps to achieve an effortless makeup look that exudes a natural appeal. Whether you have quick convenience as your motivation, or are a beginner, it is super-simple to follow. You don’t need high-end mirrors to help you glow or tools—it’s up to you if you’re obsessed with your lamp like I am with mine. Feel free to try and make them your own; maybe start with some skin tint or placement of blush. The most wonderful things about these strategies are their flexibility; they help enhance your confidence and help you celebrate your beauty. 

So, grab your tools and get to work. I cannot wait to see how it all turns out! With practice, embrace the joys of looking unbelievable while receiving compliments on your glow. Here’s to looking and feeling our best—even when minimal effort is used.

Lila Hart
Lila Hart

Hey, I’m Lila Hart, a coffee-loving fashion junkie turning Pinterest dreams into real-life looks — on a budget. I live for designer vibes at discount prices and I’m here to spill all the hacks that make you look rich and feel confident. New tips drop daily, because style doesn’t take weekends off.

Real Style Guide
Logo